Getting started with Pure-C on the Atari ST
Getting started with Pure-C on the Atari ST
TLDR: I found setting up Pure-C to get started with development took me too long (a hour or so on and off to figure it out), so have documented the key points in the process to get up and running. Install, Configure, Code, and Create a Project File are the key steps.
Why?
I got my first Atari ST back in the late 80's. It was magical. Sure, the games were good, but what I really loved was poking around the OS, playing with configuration files, and programming on it. Bending the computer to my will, and just experimenting, was really enjoyable.
One thing I never did was and GEM or AES programming. If you're not sure what these are, the short version is that it's the OS and UI built into the ROM of the machine, with AES being the framework providing the graphical UI. It might be part of a mid-life crisis, but I want to explore graphical UI programming on the Atari ST, so have decided to learn.
Pure-C
I chose Pure-C due to a couple of posts in forums. The sensible options seemed to be Lattice-C or Pure-C, and Lattice-C GUI is rumored to be a bit unstable, so the 3 minutes of research I did settled on Pure-C. It's downloadable from here.
First step - unzip pure-c and install it in a directory on your ST. Then run pc.prg.
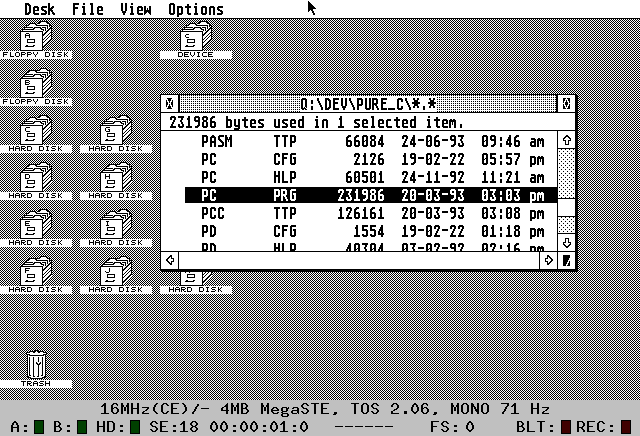
Configuration
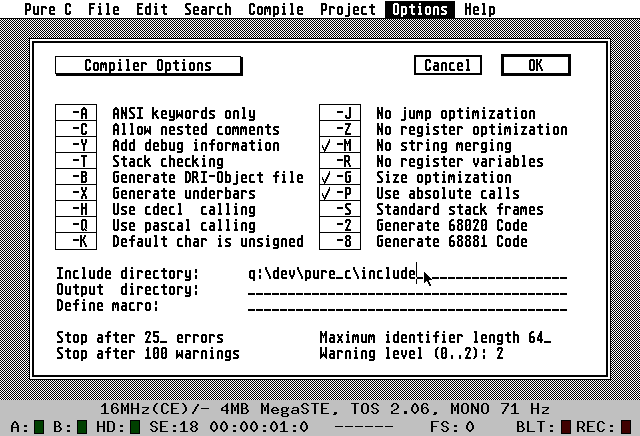
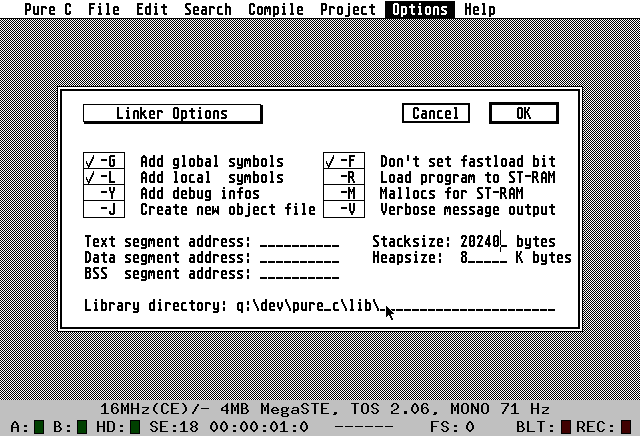
Pure-C needs to know a couple of things to be able to build applications. It needs to know where to find the header files, and it also needs to know where to find the libraries with external functions (like standard library functions).
At a minimum, you need to set the Include directory (header files) for in the Options -> Compiler menu, and the Library directory (LIB files) in Options -> Linker. Once there are done, you're ready to code.
Coding
Use the File -> Open .C menu item to create a new file, and get typing. I wrote my first C program (for about 15 years) based on the C-Manship Complete PDF, and compiled it.
#include <stdio.h>

int main (void)
{
    char ch;

    printf("Press return\n");
    ch = getchar();
    return(0);
}
Compile -> Compile "<my file.c>". All good. Then, to make an executable application, you need to make a Project.
Project
Use File -> Open .PRJ to make a new project file in the same directory as your .C file above. Then, in the first line put the name of the output file. Next line should have an =. Pure-C uses this as a separator between sections of the file.
Below this, you need to include all the dependencies for the compiler and linker. They are loaded in the order they are presented. I found for my simple file above, that 3 entries were needed.
pressret.prg
=
PCSTART.O
pressret.c
PCSTDLIB.LIB
The 3 files that are needed to build the executable are PCSTART.O (startup module), pressret.c (my code), and PCSTDLIB.LIB (the standard library - which provides the functions from stdio.h).
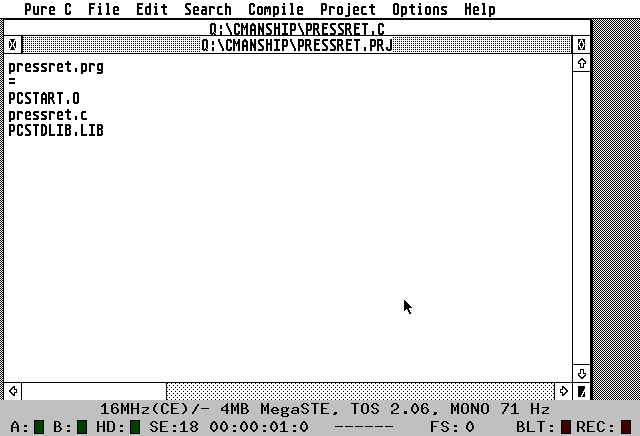
All the Pure-C libraries are in the lib directory within the Pure-C directory. The way I connected the use of stdio.h to PDSTDLIB.LIB was through the documentation. Help -> Libraries, and you don't have to read German perfectly to figure it out. The top page connects the files to general areas, and the details show which functions are in those libraries, and which headers need to be imported.
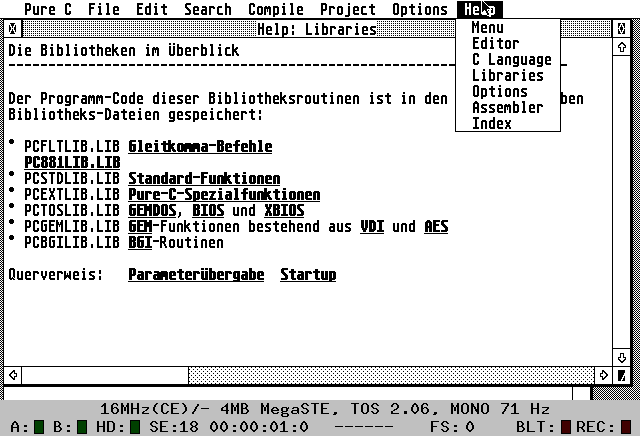
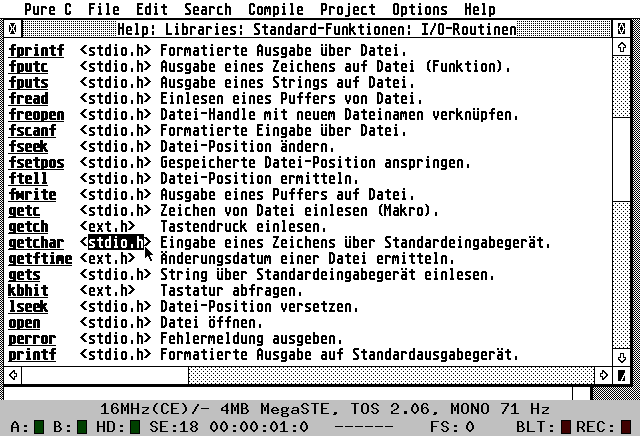
Project files can get much more complex, with submodules and multiple dependencies. Check the Pure C English Overview available in PURE_C.TXT in initial link to Pure C up the top of this post.
Running
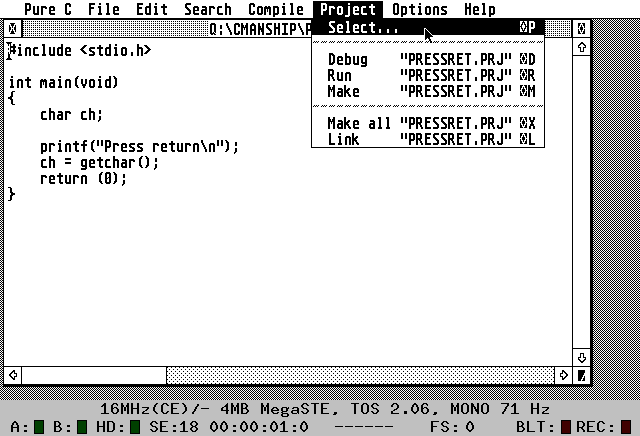
Once all that setup is done in the project file, the application executable should be able to be built and run. Project -> Select to choose the project file to use, and then Project -> Make All to make the application, or Project -> Run to make and run.
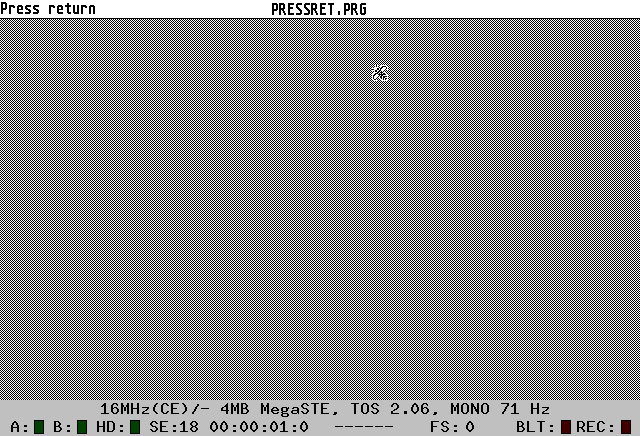
Behold the majesty!
Hope that helps. I want to document more of the GEM programming journey as well. I plan on doing this by running through the C-Manship book - fingers crossed I find the time.